
| December 11, 2010 | There are two tools that are very often used in Sketchup: the circle and arc tool. A deeper discussion about these two tools is posted in Tool time: Circle and Arc Tool. This chapter also explains how to create a 'perfect' arc, one that merges seamlessly with a line or another arc. |
| December 4, 2010 | Chapter on "Adding Roof Element" has been posted. Now the Project-One house final shape is complete, ready for some finishing work. However, I plan to talk about some tools first before continuing with this project. |
| November 21, 2010 | Chapter on "Adding Interior and Exterior Details" has been posted. More to come. |
| November 19, 2010 | Hello guys, sorry for not updating the tutorial for more than eight months now. Google has released a SketchUp version 8.0. (UN)Luckily, the update for the free version is more toward Google Earth modeling, which I don't plan to cover (at least for now). Other than that, the rest is almost completely the same. Fix some links to accommodate the update, and plan to catch up. See you soon. |
| February 14, 2010 | I have uploaded some bathroom components to the 3d warehouse. We need these components for the next lesson: "Adding Some Details" |
| February 7, 2010 | We are now ready to Place all Windows to our windowless house. |
| February 1, 2010 | Let's add some doors to our 3D modeling |
| January 25, 2010 | Let's start our 3d modeling tutorial by creating a floor plan and make walls and floors from the plan. |
| January 21, 2010 | I have uploaded three Dynamic Components to the 3d Warehouse. These are the first batch of Quicky Components that are essential for creating the 3d model in Project One. |
| January 18, 2010 | Need some time to
translate components with the right English terminology. Meanwhile you may want to check your hardware and download some files to work with this tutorial. Afterward, you can start installing and setting up your SketchUp and find out about our SketchUp projects. |
| January 17, 2010 | I use SketchUp quite extensively during the construction my new house. This may give you some ideas if you are planning or in the middle of constructing or remodeling a house. |
| January 14, 2010 | More translation of Section: Welcome and Introduction to SketchUp have been posted. More are still to come. For the time being, you can browse: Improving Model Accuracy and see an example of a SketchUp model I have created. |
| January 13, 2010 | Google issues SketchUp Release 7.1 Maintenance 2 (7.1.6860). It fixes some bugs, security issues and some language interface. |
| January 12, 2010 | This Welcome page is first posted. This blog is officially born. |
| January 10, 2010 | One Chapter per week target is achieved, The final Chapter of Project One of the Indonesian version of this blog is completed and this English version is started. |
| November 17, 2009 | Google issues SketchUp 7.1.6087. Although this is a not a major update, it has a better texture management for better spanning and orbiting (But ... 3D import is missing). |
| November 5, 2009 | SketchupTutor blogspot, a sister site to this blog to born |
Welcome
This blog is not intended to discuss architecture but rather to
explore and learn an excellent yet free 3-D modeling software from
Google: SketchUp. However with its surprisingly ease of use, this
application might be just the one you need to reveal "the architect
in you".
The users of this Sketchup tutorial are absolute beginners who do
not have
prior knowledge
of any 3D modeling software or anyone else who wants to learn SketchUp
from square one. What you need is just a general knowledge of
using Microsoft Window applications, a little bandwidth and a lot of
time to have fun. Anything else is free ...
This Sketchup tutorial blog is structured more like a book with sections and chapters, than journal like postings as you would see in a normal blog. Therefore you can use this blog as you usually do when reading an e-book. The main organization of this Sketchup tutorial is as follows:
- Main Page. The Home page of this blog will always be this Welcome post. At the top of this page, news regarding updates to this blog will be posted along with information regarding SketchUp updates released by Google, or any news that I believe is relevant to this blog readers.
- The Left column. The left column is the Table
of Content of this book, which will be divided into
Sections and Chapters. Except for the first two sections (Welcome
and What is SketchUp), all Sections and Chapters
are
designed as step-by-step tutorials and that are to be done in
sequential order as each chapter is started where previous chapter left
off. However, a link to a base model is provided at the beginning of
each chapter in case you want to start directly with the chapter.
- The right column. This column will contain a General
section. Here we will discus Tips & Trick and SketchUp techniques
which are too lengthy to be part of any of the chapters. Another
section in this column is Freebies.
Every now and then I would post 3-D models and components that I have
created that might be of interest.
Each posting in this column can be read separately since each is an individual topic by itself.
This is a "show and tell" Sketchup tutorial. For each step
in the modeling process, there will be a general explanation in how
and what
tool you need to use to finish the step. At the end of each step,
an animation is shown to have a clear understanding how it is done in
SkecthUp. I also provide you with a detailed list of steps taken in the
animation (especially in the first few chapters). In order not to
clutter the pages, these detailed steps are hidden until you click the
"Detailed Steps" button .
It is expected that by doing this Sketchup tutorial you can make 3d
model of
your current and/or planned home and.or can seek inspiration from
various
sources to put into your SketchUp model .
As I am also writing a sister blog in Bahasa Indonesia, I hope this is not a way too tall order.
Cheers,
Harrynov
 After the physical form of the house is completed, We would do some finishing work by adding material such tiling, paint, grass as you normally would to finish a home building.


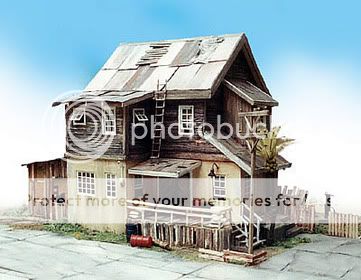 There were times
that we could only make model house
using cardboard, toothpicks, plastic sheets, and some paints. If you
wanted to add objects to
the model, such as furniture, human figures, you had to look for
objects with the
same scale with the house. Not too easy a task. Some people can make
very
realistic model house as shown in the pictures. Drawback: difficult to
make,
not easy to modify, costly and need a
lot of time to finish. Not to mention prone to
damage by a flying ball.
There were times
that we could only make model house
using cardboard, toothpicks, plastic sheets, and some paints. If you
wanted to add objects to
the model, such as furniture, human figures, you had to look for
objects with the
same scale with the house. Not too easy a task. Some people can make
very
realistic model house as shown in the pictures. Drawback: difficult to
make,
not easy to modify, costly and need a
lot of time to finish. Not to mention prone to
damage by a flying ball.
