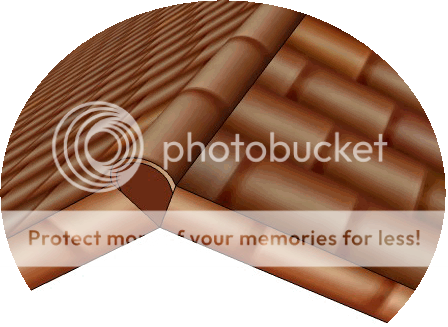
 The house has a
simple gable
roof with ceramic roof shingles. Both sides are enclosed with ridge
verges
and the top is
enclosed with ridge shingles, all with the same material with the roof
shingles.
The roof has a 30° slope and is positioned exactly in the center point
of the west
wall. Fascia will be added to cover the bottom end of each roof.
The roof will be extended 60 cm downward to create roof eaves for added
protection to the wall.
The house has a
simple gable
roof with ceramic roof shingles. Both sides are enclosed with ridge
verges
and the top is
enclosed with ridge shingles, all with the same material with the roof
shingles.
The roof has a 30° slope and is positioned exactly in the center point
of the west
wall. Fascia will be added to cover the bottom end of each roof.
The roof will be extended 60 cm downward to create roof eaves for added
protection to the wall.
In this tutorial, I do not include the roof truss because the detail
of this structure is best left to experts. However, you can draw the
truss when its design has been completed, i.e. to study available space
for roof storage, and superimpose it to the final 3D model.
Steps taken to create the roof are as follow:
-
| Previous 3D Model |
| Chapters in this Sketchup
tutorial are
expected to be done in chronological order.
However, if you want to start from this chapter, please download the
last model created from previous lesson(s) at the the 3D warehouse. |
Separating walls and floors from the back and front yards before adding
the
roof element
- Creating basic shape of the roof.
- Creating roof shingles component.
- Creating ridges and ceiling.
- Adding decorative molding to the ceiling.
- Roof finishing.
Separating Walls, Floors and Yard Elements into groups
At this tutorial stage there are already quite a lot of objects that
we have
added to the SketchUp 3-D model. In general, these objects can be be
grouped into:
- Floors and Walls
Walls and floors including every object attached to them, such as
doors, windows, bathroom and terrace.
- Front yard and back yard.
The remaining empty area in the lot that we will fill with outdoor
objects
and vegetation.
To ease further editing the 3D model, we need to isolate these
objects by putting them into separate groups. One by one, we will
select similar objects using Select tool
and make them a group.
tool
and make them a group.

-
| Tip & Trick |
Selecting object using
Mouse
Clicks
We can use mouse click to select object(s).
- Single click to focus editing on an object.
- Double click to select a face and its edges.
- Triple click to select all connected faces and
edges to the clicked object.
To change our selections:
 Holding [Control] key to add another object
to the selection, Holding [Control] key to add another object
to the selection,
 Holding [Shift] key to add OR remove
an object from the selection. Holding [Shift] key to add OR remove
an object from the selection.
 Holding [Shift+Control] keys to remove an
object from selections Holding [Shift+Control] keys to remove an
object from selections
|
Move the camera so the whole model can be clearly seen from the west.
- Choose Selecttool
and press/hold
[Control] until the cursor appear like .
Double Click at the front
yard,
and then double click at the back yard to include it to the
selection.
- Put the selected objects into a group using Context menu
-> Make Group. Reactivate the context menu to rename
the group as "Yards" using Entity Info window. Close the window to
finish.
- Select all objects using windows Select All
short-cut (Ctrl+A).
Then select again Selecttool
and press/hold [Shift+Control]
until the cursor turns into .
Click once at the Yards group to exclude it from current selection. I
don't particularly user mouse clicks to select objects one by one since
there are already a number of object in the model(doors, windows,
terraces, bathroom components)
- Redo as in step (c) to make the selected objects a group. Name
this group as "Floor 1".

 |
| Tutorial
Animation for Creating wall and floor group. |
Creating the roof basic shape
We want the roof to have a 30° slope, with its axis
positioned right at the middle of the western wall. For that, we will
create a prism based on an isosceles
triangle as the basic form of the roof. With available dimensions and
slope specification we can find the roof
high using trigonometric formula. But that's not SketchUp, in this
tutorial we will only use
Tape Measure tool
tool,
Protractor tool
tool
and
Line tool
tool
to help us create
triangle.
-
| Tip & Trick |
Protractor Tool
SketchUp provide us with a Protractor tool to create a guide line at a
specified inclination to a certain line/object.
Set
the origin point of the slope, and specify another point to specify the
base line. Then, set the size of the slope using the mouse and the
Measurement Tool.
 The
cursor will change as illustrated. The cursor color will be black
when its rotation plane is not the parallel with one of the three axes. The
cursor will change as illustrated. The cursor color will be black
when its rotation plane is not the parallel with one of the three axes.
|
Make sure we are not inside any of the groups by clicking anywhere
outside the existing groups.
- Add a guide to create an isosceles triangle with a slope
30° and with roof peak positioned at the middle of the western
wall:
- Select Tape Measuretool
and click at the right edge of the western wall to find the top center
position of the wall. Move the mouse toward the middle of the wall and
press Click when the Midpoint
inference appears indicating the exact middle point of the wall edge.
- Select Protractortool
and move the mouse some
where on
and above the west floor until the protractor color turns Red. Press
Shift to
lock this position and click at the upper right corner of the wall to
initiate the slope.
- Click
somewhere on the upper end of the wall to make it the base line
and rotate the protractor upward and type in [30] to set the slope at
30°.
- To create an isosceles triangle, just use the Linetool
to create a line starting from the right most point of the west wall
edge, to the intersecting point of the guides, and to the left most
point of the wall edge, and go back to the starting point so an
isosceles triangle will be created.
When the three lines has completely created an enclosed space, SketchUp
will automatically create a face.
- Select the Push/Pull
 tool
and push the newly created triangle away until it reaches the east
wall, forming an isosceles prism.
tool
and push the newly created triangle away until it reaches the east
wall, forming an isosceles prism.
- Remove the guides using Erase
 tool.
tool.
 |
| Tutorial
animation to create the roof basic shape. |
Creating detail shape for roof shingles
-
Creating Roof Tile Component.
Although technically, we can easily make each shingle as a
component with the shape and size similar to a real shingle. This can
make a lot of burden to the computer processor. Therefore in this
tutorial we will only make the overall shape of the roof shingles and
later we will add a pattern that will cover this shape.
The roof shingles of the house is comprised two identical parts,
front and rear. At this stage we will prepare only the detail shape of
the
roof tile parts and we will add tile patterns in the next chapter of
this tutorial. We will add ridge verges on the left/right side of the
roof and fascia to cover the bottom edge of the roof shingles. We will
the
same material patterns for the all the shingles verges, and therefore
we
need to make this part of the roof a group or component (More
about this in "Finishing"). Since the front roof is shaped
exactly the same with the rear, we will make it as a component so that
it can be reusable for the rear side.
| Tip & Trick |
Component
If a rather intricate object is going to be used for more than once in
a model, it is better to define it as a component since edits to a
component will be reflected in every instance of the component in the
model, thus more efficient modeling. |
The roof shingles shape will be based on the the front face of the
roof basic structure. Create a new box by pulling the face 10 cm high
(the
thickness of the entire structure of the roof and battens) using the Push/Pulltool.
Make the box a component and change its the axis consistent with the
roof slope. We also need to lengthen the lower part of the component by
60
cm to create roof eaves to cover the upper part of the front and rear
wall.
-
| Tip & Trick |
Selecting object(s)
using the context menu
In addition to mouse clicks, object selection can also be done using
the Context Menu -> Select with these options:
- Bounding Edges. To select only the
surrounding edges of an active face
- Connected Faces. To select
only faces that have edge(s) touching directly with an active face.
- All Connected. To select all
faces and edges that directly connected to an active face.
|
Select Push/Pulltool
and press [Control] once to create a new face. Click at the
front face of the roof basic shape and pull it upward 10 cm
- Select all the connected faces to the newly add face:
- Choose Selecttool
and right click
at the face of the roof structure to activate the Context menu.
- Select
all the thickness of the object using Context
Menu -> Select -> Connected Faces. This command will select all
face connected to the initial face we select. The underneath face will
not be selected. We will fix this later.
- With the objects selection as in point (c), reactivate again
the
context menu and display the "Create Component" window.
- Rename the component to "Roof Shingles"
- Press Set Component Axis button to reorient the axes
consistent with the roof slope.
- Click at the bottom corner of the roof shingles to
set it
as the axes crossing point
- Click on the bottom line which is parallel to the
main red axis to establish the direction of the component red axis
(This is just to confirm that the component red axis remains parallel
to the main red axis).
- Click on the bottom sloping line to set is as the
component blue axis .
- When the "Create Component" window reappear, check at
the "Replace selection with component" so that the original group will
be completely replaced with the component that we create.
- Click the Create button to finish the component.
- Add the lower part of the roof shingles by 60 cm for
roof
eaves so the top of the wall will be protected from rain and sun.
 |
| Tutorial
animation for the front section of the roof shingles. |
-
Rear roof shingles and finalizing the roof element
The rear part of the roof is exactly the same with the front.
So, we only need to copy the front component and fix its orientation it
by rotating the component copy by 180° using the Rotate tool.
Later we will fascia
at the front side of the roof shingles with a thickness of 2 cm and a
height of 25 cm using of Push/Pulltool.
tool.
Later we will fascia
at the front side of the roof shingles with a thickness of 2 cm and a
height of 25 cm using of Push/Pulltool.
-
| Tip & Trick |
Rotate Tool
We also can use Move /Copy
tool to rotate an object at its designated rotating point(s). To
rotate an object at any other point, we use the Rotate tool.
To use the rotate tool, first we need to specify its rotation plane,
then select the rotation point and specify the rotation angle.
 The
Cursor shape will appear as illustrated . The cursor color is black if
the rotation plane is not parallel with any of the three main
axes. The
Cursor shape will appear as illustrated . The cursor color is black if
the rotation plane is not parallel with any of the three main
axes. |
Copy the roof tile component using Move/Copy tool
and [Control] key and
put it somewhere on the back.
tool
and [Control] key and
put it somewhere on the back.
- Rotate the new copy of the component so it will be a
mirror image to the front roof using Rotatetool.
- Select Rotatetool
and focus the mouse to
the
horizontal
plane until the cursor turn blue and
press [Shift] to lock the
orientation.
- Move
the mouse over the topmost line of the component copy and click at any
point along that line and release the Shift key to set the point
as the center of the rotation.
- Move the the mouse again along that same line and and
click to set the line to rotate.
- Make a right rotation using the mouse and type in
[180] to make a half circle rotation.
- Move the new roof tile component so it will touch perfectly
at the top with the original copy of the component using Move/Copytool.
- Fixing the lower side of the roof shingles component.
When creating the roof shingles component (1c), we only selected the
upper
faces of the roof tile block, so at the moment the bottom face is
still missing.
- Double click at the roof shingles component to enter edit
mode
of the component.
- Using Linetool,
create a new line along the bottom edge of the component and a face
will be created covering the bottom part of the component.
- Add fascia to cover the bottom side of the roof tile set.
- Select Push/Pulltool.
and press Control key to add a new face and pull the face forward by 2
cm.
- Still using Push/Pulltool,
click at the bottom face the newly created square and pull it
down
to crate fascia with 2
cm thick and and 25 cm high along the tile lines.
- Exit the component edit mode using Selecttool
and by clicking
anywhere outside the component.
Notice that, the front side roof component also will be automatically
fixed and added the fascia.
 |
| Tutorial
animation for rear roof shingles. |
-
Adding Ridge Shingles
Ridge shingles are added to the top edges between the two
sections of the roof. The ridge is shaped as a half circle bulge
positioned along the top edges as illustrated below.
 To create the ridge shingle
shape, we will also us the Arc
To create the ridge shingle
shape, we will also us the Arc tool
to form a semicircular curved
line connecting the two peaks of each roof section.
Then add two lines using Linetool
along the top edge of
each roof section to create a face.
The face is then pressed down along the width of the roof sections
using the Push/Pulltool
to create the ridge shingle shape.
tool
to form a semicircular curved
line connecting the two peaks of each roof section.
Then add two lines using Linetool
along the top edge of
each roof section to create a face.
The face is then pressed down along the width of the roof sections
using the Push/Pulltool
to create the ridge shingle shape.
- Ensure we are not inside a group/component by clicking
somewhere outside any of the group components using Selecttool.
- Move the camera view on to somewhere near the west side of
the joining point the roof sections.
-
| Tip & Trick |
Arc Tool
We
will use Arc tool to create a curved line. Soon after we select the Arc
tool, we can enter the number of segments that the arc will consist of.
More segments mean smoother arc, but will effect the file size and the
processor load.
After the arch is created, we can simply type in the height of the arch
so that the final shape of the arc can be controlled accurately. |
Select Arctool
and click on the upper end of the rear roof section and then click
again on the upper end of front roof section. Slide the mouse upward
and click when the "Half Circle" inference appears to create a
semicircular arch.
- Select the Linetool
and click at the starting point of the newly created arch, click again
at bottom point of the roof section intersection, and click again on
the other end of the arch to close the edges and to create a face.
- Double
Click at the newly created face to select the face and turn in into a
group using the context menu. Activate Entity Info window and rename
the group as "Ridge".
- Double click the new group to enter edit mode. Select the Push/Pulltool
and click on the surface and push the face eastward and immediately
type in [700] to completely fill the gap between the two roof sections.
- Exit the group editing by clicking anywhere outside the group
using Selecttool.
 |
| Tutorial
Animation to add Ridge Shingles |
Creating Gable Ends and Ceiling
Gable ends are the wall structures above the gable walls that
support a gable roof. At this point this area is mostly blocked by the
roof shingles components. Therefore we need to temporarily hide the
roof
tile
group using Context Menu -> Hide.
| Tip & Trick |
Hide
We
can hide one or a few objects temporarily in order not to obstruct view
to objects located behind the object(s). To hide object(s) we use
Context Menu or menu
View -> hide. Use menu Edit -> Unhide to unhide the objects. |
The gable end outer shape is exactly the same with the east/west
side of the roof basic shape. We just need to add thickness similar to
wall thickness using the Push/Pulltool
and remove any excess line using the Erasetool.
We will rename this group as "Gable Ends".
- Hide Group shingles so as not to block the editing of gable ends
which is located behind it.
- Click the Selecttool
and right click at the
Roof group and activate Context Menu,
- Select "Hide" to hide the roof.
- Triple click on one of the basic roof shape faces to select all
the structure and make this initial structure a group. Rename the group
as "Gable Ends" through Entity Info window.
- Create gable ends by thickening both sides of the roof basic
structure similar to wall thickness.
- Enter the Gable End group and thicken each side of the gable
end by 15 15 cm using Push/Pulltool.
- Erase all excess lines between the two gable end using the Erasetool.
- Exit the "Gable End" group by clicking anywhere outside the
group using Selecttool.
- Using the Rectangle
 tool,
create shapes of the ceiling right on top of the walls. Each
ceiling has the same shape with the enclosed space between the
walls.
tool,
create shapes of the ceiling right on top of the walls. Each
ceiling has the same shape with the enclosed space between the
walls.
- Make the living room ceiling by creating two adjacent
rectangles to fill the space between all the living room walls and
delete any excess line so there will be only one face to represent the
ceiling.
-
| Tip & Trick |
Back Face and Reverse
Face
Default
color of any SketchUp object differentiate between the front face color
and the back face color. Back face color is slightly darker than the
front face. It is important that objects faces are not reversed,
especially when we want to apply material to the objects. To reverse a
face, use Context Menu -> Reverse Back Face. |
Add a rectangle to each of other rooms exactly the same shape with the
inner space of the room walls.
- At this point, we see the ceiling from above, and it would
normally have somewhat darker color because what we see is their back
face. If any of the ceiling has somewhat lighter color, we need to
reverse the face using Context Menu -> Reverse Face.
- Unhide all hidden objects using menu
Edit
-> Unhide -> All.
 |
| Tutorial
Animation to Create Gable Ends and Ceiling |
Adding Molding to the Ceilings
All room ceilings have decorative molding around their edges.
This moulding is usually made of woods or gypsum casts. For modeling
simplicity, I do not add thickness to the ceiling and position the
ceiling
right at the top of each wall, which may not be appropriate in real
situation.
 The
detail shape and size of decorative molding is illustrated in the
picture. The flat sections on top and right side are the part that will
be attached to walls and ceilings.
To create the profile, we need to divide the hypotenuse into five equal
segments. The first two segments for the bulge and the next two
segments for the depressed part. Both are 1 cm away from the original
line.
The
detail shape and size of decorative molding is illustrated in the
picture. The flat sections on top and right side are the part that will
be attached to walls and ceilings.
To create the profile, we need to divide the hypotenuse into five equal
segments. The first two segments for the bulge and the next two
segments for the depressed part. Both are 1 cm away from the original
line.
To create this profile, we just need to make a right triangle
of 8x5 cm using the Linetool
and
decorate its
hypotenuse with a convex and concave lines. To divide the hypotenuse
into 5 segments, we just use the Divide function available in
the context menu, and using the Arctool
we add a convex line and a concave line each covering two fifth
of the hypotenuse. When the 2- dimensional profile is made,
we will
use Follow Me tool
to create this profile
along all the ceiling edges.
tool
to create this profile
along all the ceiling edges.
- Focus the view on to the east part rear corner of the bathroom
ceiling. If necessary, hide any object that may block your view block
using Context Menu -> Hide.
- Create a right triangle with a height of 8 cm and width of 5 cm
using Linetool
at a temporary
location in such a way that the lower end of the triangle is positioned
right at
one ceiling corners.
- Divide the sloping line into 5 segments
- Select
the sloping line using the Selecttool
and activate Context
menu and select
Divide. Several dots will appear along the active line indicating the
number of segments it will create when the mouse is clicked.
- Move the mouse along the sloping line and click when
the segments indicates 5. There will be five equally spaced
intersection points along the line as if the line is comprised of 5
continuing separate lines.
- Add a concave line to first two segments.
- Select the Arctool
and click
to bottom point of the sloping edge and make another click at the
end of second segment to measure the arc as 2/5 part of the hypotenuse.
- Move
the mouse to the right so a bulge is created and type in [1] to create
a concave with 1 cm height. As usual, a face is automatically created
when the area is completely enclosed.
- Add a convex line to next two segments
- Click
the mouse at the top point of the concave and move the mouse upward
until it cover another 2/5 of the slope and press click at the segment
point.
- Move the mouse to the right so a dent is created and type in
[1] to create a convex with 1 cm deep.
- Remove unnecessary lines so the final shape of the object is
similar to the above illustration.
- Prepare
the new object to be pasted at the appropriate positions by Double
clicking the face to select the whole shape, and cut it using Edit
-> Cut or Control-X (a standard window short cut for Cutting) to
store this object into computer memory.
- Paste the profile shape contained on the computer memory to a
corner
of the bathroom ceiling.
- Select the Move/Copytool
and move the mouse to the left most corner of the bathroom ceiling and
press Control-v to place the profile shape at this corner.
- Still using Move/Copytool,
position the profile to its proper location by clicking the top left
corner of the profile and move it so it be attached to the upper left
corner of the ceiling.
- Paste this object to a corner of any other ceiling .
- Focus your mouse to the corner of the living room ceiling and
press Control-V at the point of this angle, nudge the mouse a little so
that the profile shape appear at this position and press click to put
the profile on this face.
- Repeat this procedures to the rest of the room ceilings.
-
| Tip & Trick |
Follow Me Tool
We can change a two- dimensional face
into a 3-D object using Push/Pull
tool by pushing/pulling the face along a perpendicular path to the
face. To change a two-dimensional face into 3-D following path other
than perpendicular, we use Follow Me tool. First, preselect the path,
and then select Follow Me tool and click at the face. |
Create moulding for the living room ceiling.
- Focus the camera so that the corner where the profile is
attached can be clearly viewed.
- Click at the living room ceiling and activate Context
menu then choose 'Select Boundary' to select all the edges of the
ceiling.
- Select Follow Metool
and click at the profile
face that is attached to this ceiling. Automatically a profile
will sculptured around the bounding edges.
- Repeat the above processes to other areas of the ceilings to
complete all the ceiling molding. (The tutorial animation does not
include these steps)
- Exit the Gable group to finish.
 |
| Tutorial
animation to create molding for the
living room ceiling |
Finalizing the roof
Although from the outside, the roof
already seems finished, there is still a small part missing, the rear
wall of
the living room still has not reached the roof so that there is a big
opening
above the wall that needs to be filled. Add two wall sections to the
opening so
that all the walls will touch the roof. The wall addition is done
within the “Garble”
group so that the top of all the walls will still be flat. (We need
to keep the upper side of the walls flat to prepare for the second
floor addition).
To do this section, I will only show
you the animation of the process for adding these walls. Notice the
tools I used,
since you have to to do this by yourself.
 |
| Tutorial
animation for finalizing the roof
shingles element |
We have Accomplished ....
| No |
Tutorial Topics |
| 1 |
Performing three different ways of
selecting object using mouse
click(s)
. |
| 2 |
Applying standard window shortcuts to
do: Select All (Ctrl-A), Cut (Ctrl-X) and Paste
(Ctrl-V) |
| 3 |
Creating Guides with a
specified slope using Protractor Tool. |
| 4 |
Adding, changing component axes,
copying and editing a simple component. |
| 5 |
Selecting object(s) using context menu:
Connected Faces and Bounding Edges. |
| 6 |
Using Rotate Tool to spin an
object on a preselected plane. |
| 7 |
Dividing a line into several
equal length lines using context menu Divide. |
| 8 |
Using Arc tool to create a
concave or convex line. |
| 9 |
Temporarily hiding an object using
Context Menu-Hide and bring it again
back using Menu -> Unhide. |
| 10 |
Using Follow Me tool
to draw
profile along the edges of a face to create moulding around the face. |
| 11 |
Reversing a face using Context
Menu -> Reverse Face |
 We are almost done with the
Project I. We only need to add details to the front and the backyard
and apply appropriate materials such as ceramic shingles, and wood
patterns so the 3-D model will look a lot more realistic.
We are almost done with the
Project I. We only need to add details to the front and the backyard
and apply appropriate materials such as ceramic shingles, and wood
patterns so the 3-D model will look a lot more realistic.
Cheers
Harrynov

1 comments:
Your tutorial has been incredibly helpful to me, I hope you get back to it soon!
Post a Comment